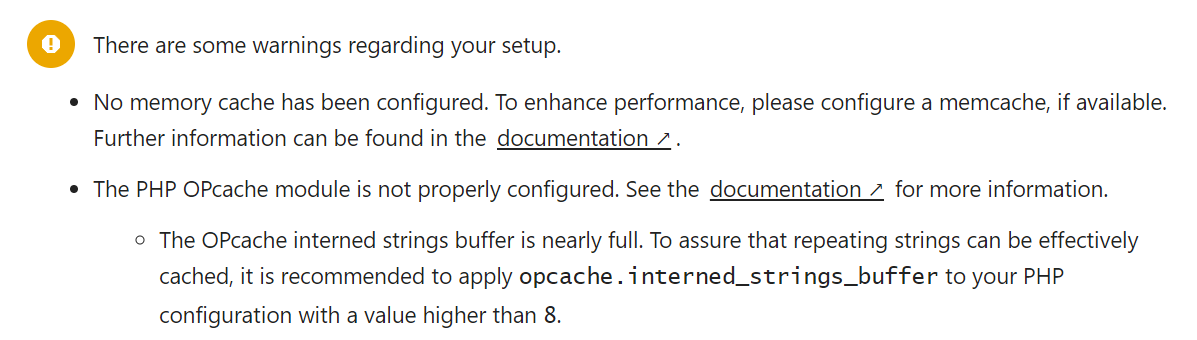
(PHP OPcache warning is second warnings in this image)
(PHP OPcache 警告是图中第二个警告)
It is recommended to refer to the Nextcloud developer manual for operation
建议参考 Nextcloud 开发者手册操作
https://docs.nextcloud.com/server/23/admin_manual/installation/server_tuning.html#enable-php-opcache
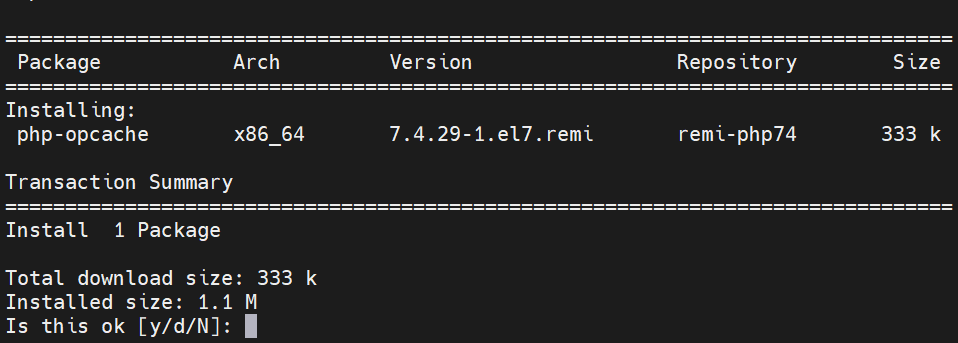
First, you need to make sure you have the php-opcache module installed
首先,你需要确保你安装了 php-opcache 模块
yum install php-opcache
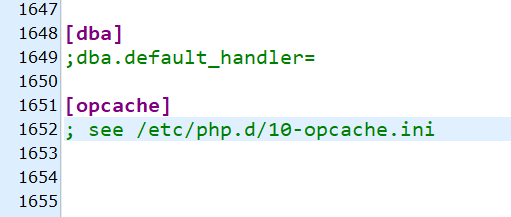
The PHP OPcache module needs to be edit in php.ini
关于PHP OPcache 模块需要在 php.ini 里进行编辑
The PHP installed by yum is generally located at /etc/php.ini
yum 安装的 php 一般位于 /etc/php.ini
vim /etc/php.ini
Find [opcache] and delete the original content
在其中找到 [opcache],删除原有内容
Then add the following contents to it:
然后在里面加入如下内容:
opcache.enable=1
opcache.enable_cli=1
opcache.memory_consumption=128
opcache.interned_strings_buffer=20
opcache.max_accelerated_files=10000
opcache.max_wasted_percentage=5
opcache.use_cwd=1
opcache.validate_timestamps=1
opcache.revalidate_freq=1
opcache.revalidate_path=0
opcache.save_comments=1
saved, and restart php-fpm and nginx process
保存,重启 php-fpm 和 nginx 进程
systemctl restart php-fpm
nginx -s reload
OK, the problem is solved
OK,现在问题应该解决了

文章评论